
A Bizarre Run Stage 2: Gates, Boom Boom Family and Survival
Learn how A Bizarre Run stage 2 works, read the deaths-needed gate, survive Boom Boom hazards, and save your boost for the finish.
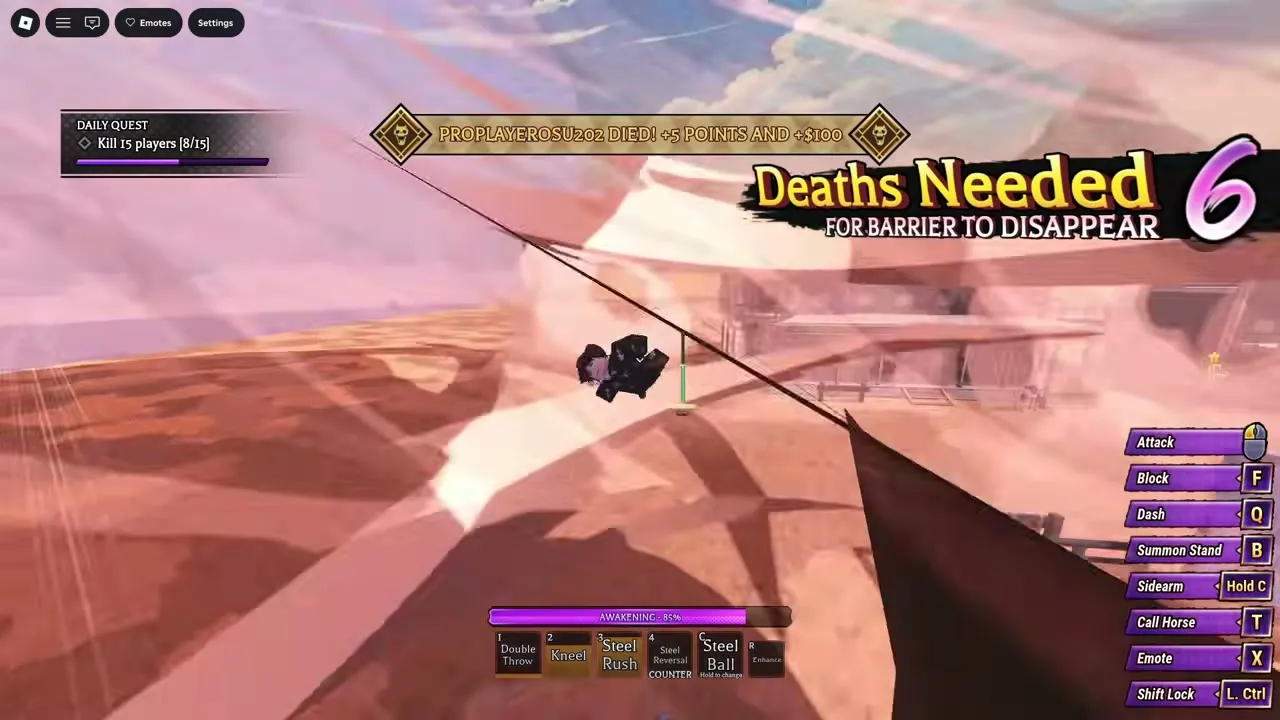
What changes in A Bizarre Run stage 2?
A Bizarre Run stage 2 can turn a strong racing position into a fight for survival. Combat, environmental hazards, and a deaths-needed barrier make staying alive as important as riding quickly. To finish A Bizarre Run stage 2, follow the current race prompts, watch the gate counter, and preserve your boost for a useful opening near the finish.
General game reference: this recording provides context, not a dedicated demonstration or proof of every topic discussed here.

WINNING WITH SPIN AND HOW TO GET & UPDATE ADDITIONS.. | A Bizarre Run — JustVision
View the source recording on YouTube.
This guide covers the Roblox public release represented by the official A Bizarre Run listing, using sources reviewed on November 9, 2026. The official listing supplies the game identity and controls. Stage-specific observations below are player experience drawn from release-era guides and race footage.
The main change from stage 1 is that other racers can directly threaten your run. Community reports describe stage 1 as racing with environmental traps, while stage 2 enables combat with Stands and equipped weapons.
| Stage 2 situation | What player experience shows | Your immediate priority |
|---|---|---|
| Bounty selection | Players can select a racer to pursue | Read the target information before choosing |
| Checkpoints and fog prompts | Racing pauses or changes pace around combat areas | Follow the current destination and timer |
| PvP encounters | Racers fight while environmental threats remain active | Watch your surroundings during attacks |
| Deaths-needed barrier | Progress depends on the displayed elimination condition | Track the live counter |
| Waterfall and bomb section | Explosives threaten the later racing stretch | Navigate the hazards and plan your boost |
Treat these as situations to recognize, rather than a route with guaranteed timings. A fight that looks manageable can change when another racer or a tornado reaches it.
How does the A Bizarre Run stage 2 deaths-needed gate work?
The deaths-needed gate holds up progression until the race’s displayed elimination condition is satisfied. In community footage, racers fight while the barrier remains active, then prepare to continue when the race advances.
Read the number shown in your own run. One recorded race displays nine deaths needed, but that moment does not establish a universal nine-kill requirement. The counter changes during play, and the reviewed sources do not establish a formula for its starting value.
The A Bizarre Run stage 2 gate also needs to be distinguished from personal objectives:
| Objective | What it concerns | How to approach it |
|---|---|---|
| Deaths-needed gate | Progression for the racers still in the stage | Monitor the displayed condition and barrier |
| Gyro’s elimination task | A quest requiring 10 player eliminations in stage 2, according to community reports | Check your personal quest progress |
| Selected bounty | A particular opposing racer | Pursue the target when the encounter is practical |
The gate counter is not an instruction for every survivor to personally collect that many kills. Likewise, completing a bounty does not establish that the barrier will immediately disappear.
If you are struggling with combat, concentrate on surviving within the area indicated by the game. Watch the counter between engagements, and reposition when fog or destination prompts require movement. Waiting in one hiding place can leave you poorly positioned when the race resumes.
If you do fight, avoid becoming so focused on a combo that you lose track of nearby threats. Player experience shows tornadoes interrupting encounters and additional opponents joining fights. The evidence does not confirm whether defeating NPCs contributes to the barrier, so do not plan around that assumption.
How do you survive the Boom Boom family and course hazards?
For A Bizarre Run stage 2, survival around the Boom Boom family starts with deciding whether a fight helps you finish. Community reports show that these NPCs can be fought, but the references do not establish a mandatory victory over them as the condition for advancing.
The community guide covering stages and NPCs recommends avoiding unnecessary fights with the family. Other player experience shows racers attacking them, taking damage, and dealing with additional hazards at the same time.
The video is narrated in Portuguese. The English explanation in this article covers the relevant observations.

GUIA COMPLETO do A BIZARRE RUN (STANDS, ESTÁGIOS, NPCS e ETC.) - Roblox — GG Games
| Threat | Supported observation | Practical response |
|---|---|---|
| Boom Boom family encounters | NPC combat can overlap with the race’s other dangers | Avoid committing to an optional fight when your priority is finishing |
| Bomb-dropping section | Explosives threaten racers during the later stretch | Watch the route ahead and move away from visible hazards |
| Tornadoes | They can interrupt racing and PvP | Keep checking their position during encounters |
| Fog and area prompts | They affect when and where racers continue | Follow the current prompts instead of remaining behind |
These are positioning recommendations based on player experience, not a confirmed sequence of safe spots. The references provide no reliable boss health totals, bomb blast radius, or exact attack intervals.
During the bomb section, prioritize steering before attacking another racer. In the recorded Spin run, the player takes a hit as racing resumes but still recovers and wins. That demonstrates that a setback can be recoverable; it does not make taking damage a reliable shortcut.
Keep the bomb hazard separate from Gyro’s quest interaction. Community reports describe a specific bomb left near the top of the waterfall where the bomb-dropping character stops. That object offers a defuse interaction for the quest. It does not mean every explosive on the course is safe to approach.
When your goal is simply reaching the finish, keep moving through the available route and avoid stopping for an unrelated objective.
How should you handle bounties, PvP, and Gyro’s quest?
Your approach to A Bizarre Run stage 2 should reflect what you want from the run. Finishing, claiming a bounty, and progressing Gyro’s quest can pull you toward different decisions.
Player experience shows bounty targets sometimes remaining far behind or avoiding combat. Select a target using the information displayed, then reassess when you actually encounter them. A bounty is a useful opportunity when the opponent is nearby and the fight is manageable; chasing across the area can distract you from the race prompts.
Be particularly careful about being outnumbered. In JustVision’s Spin race and quest walkthrough, an anti-teaming effect appears, but the player still retreats from a difficult two-on-one encounter. That player experience supports disengaging when necessary, rather than relying on the system to make the fight favorable.
If Gyro’s quest is your priority, community reports identify these stage 2 objectives:
| Quest objective | What the references support | What to check |
|---|---|---|
| Get 10 player eliminations | The eliminations must occur in stage 2 | Your active quest and recorded progress |
| Obtain the defused bomb | An interactable bomb is described after the second checkpoint, near the waterfall’s upper area | The interaction prompt where the bomb-dropping sequence ends |
| Return to Gyro | Talking to him follows completion of the required objectives | Whether your quest is ready to turn in |
These tasks follow earlier steps involving slipstreaming, a stage 1 placement, and returning Gyro’s steel ball. Reaching stage 2 alone does not establish that you have activated the relevant quest step.
The references do not clearly establish elimination carryover or every credit rule. Check the quest interface after an elimination instead of assuming that assists, NPC defeats, or an unfinished quest step will count.
If basic combat is your main obstacle, community guides identify Battlegrounds as a place to practice your abilities. Learn a dependable attack sequence and how to disengage before trying to pursue multiple objectives during a race.
When should you use your boost in stage 2?
A useful A Bizarre Run stage 2 tactic from player experience is to preserve your boost for the late racing stretch. In JustVision’s recorded win, the player saves it through earlier encounters and uses it near the finish to overtake competitors.
That is a demonstrated tactic, not a guaranteed winning timing. The useful moment depends on the route opening, nearby hazards, and whether you can maintain forward progress.
Start by knowing the controls. The official Roblox listing’s keyboard controls give the following bindings:
| Action | Official listing |
|---|---|
| Run on horseback | Shift |
| Call your horse after falling | T |
| Use the one-time boost | F |
| Pull out a secondary item | C |
| Choose a secondary item | Hold C |
| Pull out your Stand | B |
| Jump | Space |
Release-era tutorial footage shows Z for boost, while the official listing gives F. Check your current in-game controls before relying on a key shown in a recording.
For the final stretch, use this sequence:
- Check the race prompt and route. Be ready to leave the combat area when progression resumes.
- Watch the bomb obstacles. Give steering your attention before attempting another shot or ability.
- Assess your stamina and position. Avoid spending the approach entirely focused on attacking.
- Use the saved boost when it can produce forward distance. The demonstrated winning run uses it late, near the finish.
Slipstreaming also remains relevant to racing. Player experience describes gaining a slipstream benefit while sprinting behind another racer. Use an available opportunity, but keep watching the course rather than following someone directly into a hazard.
Manage stamina separately from the one-time boost. The recorded player alternates between pushing forward and allowing stamina to recover earlier in the race. No exact regeneration rate or universally best sprint schedule is established by the references.
If you fall from your horse, the official listing identifies T as the call-horse control. Recovering your position and reading the route should come before immediately restarting a risky attack.
A Bizarre Run stage 2 FAQ
Do you need nine kills to pass A Bizarre Run stage 2?
Nine appears as a deaths-needed value in one recorded run. It is not a universal personal kill requirement. Read the live gate counter and watch for the barrier or race prompts to change. Gyro’s 10-elimination objective is a separate quest.
Do you have to defeat the Boom Boom family?
The reviewed sources do not establish defeating the family as mandatory for progression. Community reports show that they can be fought, while a stage guide recommends avoiding unnecessary NPC combat. Keep following the race’s actual gate and movement prompts.
Where is the bomb for Gyro’s quest?
Player experience places the interactable bomb after the second checkpoint, near the top of the waterfall where the bomb-dropping character stops. Look for the defuse prompt at that location. The references do not establish exact coordinates or a guaranteed interaction window.
What is confirmed, and what remains uncertain?
Official information establishes the Roblox game and listed controls. Community reports support stage 2 PvP, bounties, a changing deaths-needed counter, environmental hazards, and a later bomb section. Exact gate formulas, NPC contributions to the counter, bomb damage values, and a universally safe route remain unconfirmed by the reviewed sources.
Related Articles
racing
A Bizarre Run Horses: Stats, Rerolls and Riding Controls
Learn how A Bizarre Run horses work, which stats community guides report, where to customize mounts, and how to manage boosts and rerolls.
racing
A Bizarre Run Racing Tips: Slipstream, Stamina and Boost Timing
Use these A Bizarre Run racing tips to manage stamina, line up slipstreams, time horse boosts, and survive Stage 2 hazards.
racing
A Bizarre Run Saddles: Customize Menu and Confirmed Details
Find A Bizarre Run’s saddle options through Customize, with confirmed menu details and limits on prices, unlocks, and stat claims.
Was this helpful?
Thanks for the feedback!