
A Bizarre Run Beginner Guide: Controls, Stands and Your First Race
Learn A Bizarre Run controls, race stages, Stand acquisition, and smart reward spending, with official facts and community tips clearly separated.
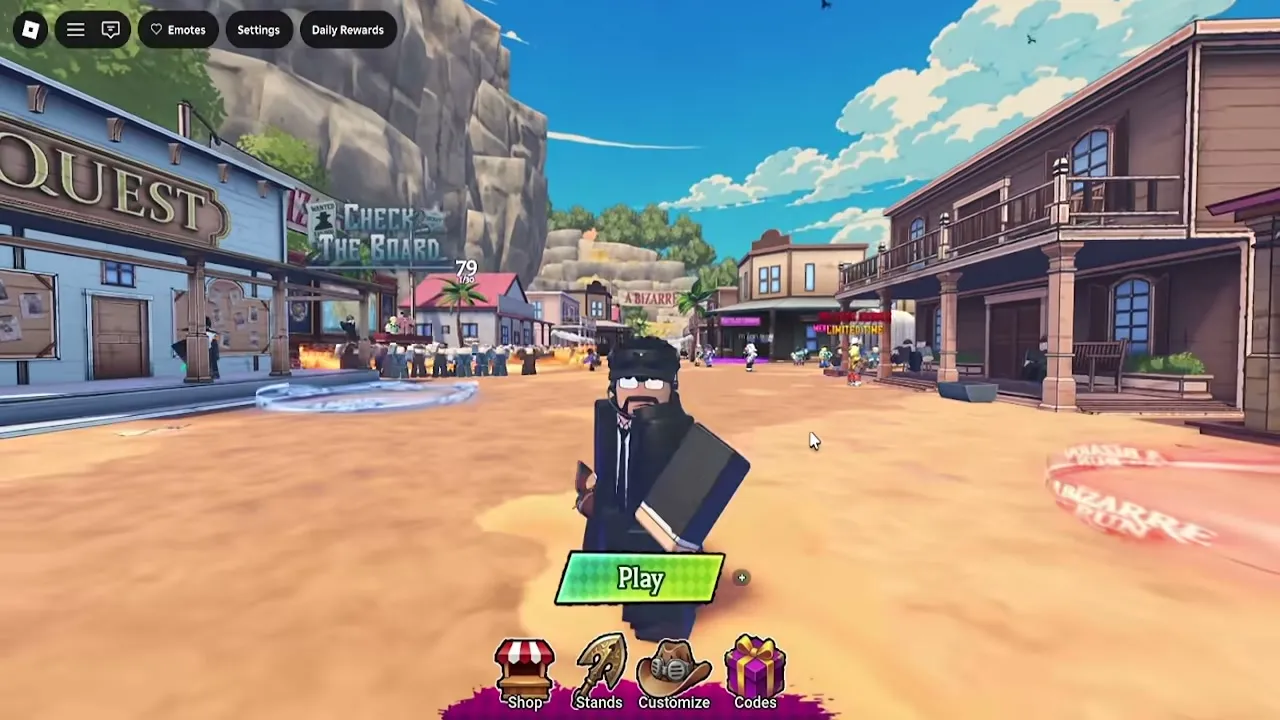
How do you get started in A Bizarre Run?
Your first race can turn from a sprint into a fight before you understand your Stand. This guide explains how to prepare, manage your mount, and handle that shift into combat. Use this guide to spend early rewards carefully and learn the controls before chasing a win.
General game reference: this recording provides context, not a dedicated demonstration or proof of every topic discussed here.
The video is narrated in Portuguese. The English explanation in this article covers the relevant observations.

GUIA COMPLETO do A BIZARRE RUN (STANDS, ESTÁGIOS, NPCS e ETC.) - Roblox — GG Games
View the source recording on YouTube.
Start with the correct experience: A Bizarre Run on Roblox, created by A Bizarre Run By Current.. Its official listing identifies a fan-made game inspired by Steel Ball Run, featuring horse racing and a separate Battlegrounds mode.
This guide covers the public release represented by the November 9, 2026, [D4C] listing. The official information does not provide a numeric gameplay patch version.
| Mode | What it offers | Useful beginner objective |
|---|---|---|
| A Bizarre Run | Races involving mounts, hazards, and combat | Learn the route and reach later race sections |
| Battlegrounds | Separate combat gameplay | Practice your Stand’s attacks and defensive options |
Community reports describe several useful lobby menus. Before entering a race:
- Check the quest board. Read your daily and weekly objectives so you know which activities advance them.
- Claim available daily rewards. Inspect the displayed reward instead of assuming every day gives the same item.
- Open Customize. Review your mount’s stats and customization options.
- Inspect your Stand inventory. Understand which slot is equipped before using consumables.
Complete the tutorial if you are new. Player experience from the linked footage shows it introducing slipstreaming, hazards, and boosting—mechanics that become harder to learn while other racers are interfering.
Which controls should beginners learn first?
The control priority in this guide is simple: learn movement, recovery, and item selection before experimenting with combat combinations.
The following keyboard inputs come from the official A Bizarre Run controls listing.
| Action | Officially listed input |
|---|---|
| Run while mounted | Shift |
| Call your horse after falling | T |
| Use the one-time boost | F |
| Pull out your secondary item | C |
| Choose a secondary item | Hold C |
| Summon your Stand | B |
| Emote | X |
| Jump | Space |
There is a boost-key discrepancy in the reviewed sources. The official description lists F, while community guides and tutorial footage show Z. A community control chart also assigns F to blocking during combat.
Check the mounted HUD and your current control settings before relying on either key. Mounted actions and combat actions may use different contextual bindings, and the reviewed sources do not establish why the sources disagree.
Practice these three actions during the tutorial: sprinting behind another racer, selecting a secondary item, and identifying the displayed boost prompt. Know where the horse-recovery command is before your first fall.
These are keyboard references. The official facts do not establish a complete controller layout, touch layout, or compatibility list for every Roblox device.
How do the race stages work?
Community reports in GG Games’ launch walkthrough describe two race stages with a train intermission. The important takeaway from this guide is that racing priorities change once direct combat becomes available.
| Race phase | Community-reported behavior | Your immediate priority |
|---|---|---|
| Stage 1 | Direct player combat is disabled; environmental traps remain relevant | Learn the route and manage stamina |
| Train intermission | Players wait and can purchase supplies | Review useful items before spending |
| Stage 2 | Combat, bounties, hazards, and elimination barriers appear | Protect your health and prepare for the finish |
Stage 1: build speed without losing control
Slipstreaming rewards sprinting behind another racer. Tutorial footage demonstrates the resulting speed increase, making another rider’s position useful even when you are temporarily behind.
Avoid treating first place at every moment as your only objective. Player experience shows racers recovering positions through shortcuts and well-timed boosts. For early runs, staying on the route and recognizing hazards gives you something repeatable to improve.
Watch your stamina instead of holding sprint without checking it. The linked Spin gameplay includes moments where the player eases off to recover stamina. That supports pacing your effort, although it does not establish an exact regeneration rate or optimal sprint schedule.
Environmental sabotage still matters in Stage 1. Community reports describe shooting TNT and triggering course hazards even when direct player combat is disabled. Keep watching the path while aiming; a successful shot offers little benefit if you immediately miss a turn.
Stage 2: protect your chance to finish
Stage 2 adds fighting, bounty targets, hostile NPCs, and environmental dangers. Community reports also describe barriers that remain until enough players have been eliminated. Watch the displayed requirement instead of assuming the same elimination count applies to every race.
Choose fights carefully. Chasing a distant bounty or entering a crowded fight can distract you from the next racing section. In the linked Spin footage, the player backs away from an unfavorable two-against-one encounter.
Player experience from the Spin unlock and race demonstration supports saving Stage 2’s available boost for the final stretch. The player uses that timing to recover positions and win.

WINNING WITH SPIN AND HOW TO GET & UPDATE ADDITIONS.. | A Bizarre Run — JustVision
Treat this as a practical strategy to try. Check that your boost is available, identify a clear path, and avoid spending it immediately before an obstacle.
How should you spend your first rewards?
The spending rule in this guide is to understand what a purchase changes before committing your early Cash. A reroll, a cosmetic purchase, and a consumable serve different purposes.
| Resource or menu | Supported use | Beginner approach |
|---|---|---|
| Cash in Customize | Changes to mount stats and appearance | Read the purchase description carefully |
| Stand Arrow Fragments | Crafting Stand Arrows | Check your fragment total and recipe |
| Stand Arrows | Acquiring a Stand | Confirm your selected inventory slot |
| Rokakaka Fruit | Resetting a Stand | Preserve anything you want to keep first |
| Daily rewards and quests | Progression rewards | Claim completed objectives and read timers |
Sportskeeda’s beginner guide reports that mount rerolls randomize Stamina, Acceleration, Handling, Top Speed, and Boost Length. A reroll therefore does not guarantee improvement.
Inspect your current spread before spending. If you are still learning corners or repeatedly exhausting stamina, note those problems across several runs before deciding what you want from a different spread. Check the live menu for the current cost.
Codes may also provide starting resources. Beebom’s November 8 code list reports RELEASE, D4C, 50KLIKES, and FIXEDANTITEAM. Their availability on a later date is not confirmed by that dated list.
The reported redemption process is to complete or skip the tutorial, open Codes, enter the code, and select Redeem. Copy the spelling carefully. A like milestone in the game description does not establish a redeemable code string or its reward.
How do you get Stands and work toward Spin?
Stand progression in this guide starts with Arrows because that acquisition method is supported across multiple reviewed community sources.
Community reports describe earning Arrow Fragments through rewards and crafting them into Stand Arrows. GG Games’ walkthrough gives a recipe of five fragments per Arrow; confirm the requirement shown in your crafting menu before using resources.
| Step | What to do | What to check |
|---|---|---|
| Collect resources | Claim available rewards and inspect earned loot | Whether you received fragments or a complete Arrow |
| Craft an Arrow | Open the relevant crafting option | The displayed fragment requirement |
| Select a slot | Inspect your Stand inventory | Whether the selected slot contains a Stand you want |
| Use the Arrow | Follow its selection interface | The choices presented by your current version |
| Practice the result | Enter Battlegrounds | Attack range, defensive options, and ability timing |
Keep a useful Stand while learning
Community reports describe two initial free Stand slots and using a second slot to preserve an existing Stand. Check your inventory for an available empty slot before consuming a Rokakaka.
Rokakaka resets a Stand. It is useful when you deliberately want a replacement, but using it without checking the equipped slot can remove something you meant to keep.
For combat practice, start with basic attacks and add one ability at a time. Learn which moves keep an opponent nearby and which send them away. Community reports describe this distinction when demonstrating combo extenders and finishing attacks.
The linked videos discuss balance changes affecting several abilities. Their tier opinions should be treated as player experience rather than a permanent ranking.
Make Spin a later progression target
Spin is an optional next goal in this guide. Community reports describe it as Gyro’s fighting style, with steel balls replacing the revolver.
The linked unlock demonstration reports a two-win requirement and a quest chain involving:
- Slipstreaming for 15 seconds.
- Finishing Stage 1 in 10th place or better.
- Finding Gyro’s randomly placed steel ball in Stage 1 and returning it.
- Earning 10 player eliminations in Stage 2.
- Interacting with the bomb left after the bomb-dropping section, then returning to Gyro.
Read Gyro’s current dialogue to confirm your active objective. The reviewed sources do not establish a fixed steel-ball location, so avoid following a supposed guaranteed spawn route.
Frequently asked questions
What should I focus on first in an A Bizarre Run beginner guide?
Complete the tutorial, check your mounted controls, and learn Stage 1’s route. Claim available lobby rewards, then practice your Stand in Battlegrounds so Stage 2’s combat feels less unfamiliar.
Is the boost key F or Z?
The official listing specifies F. Community reports and tutorial footage show Z. Use the prompt on your current mounted HUD and check settings, especially because a community combat layout also uses F for blocking.
Are Corpse Parts a confirmed beginner progression route?
The reviewed community reports conflict: one walkthrough describes obtaining and using them, while another says they are unavailable. The official sources cited here do not resolve that disagreement. Stand Arrows are the more consistently documented starting route.
Do I need Robux to begin?
Community reports describe starting and progressing without mandatory premium purchases, including earning resources through gameplay and rewards. You can begin by learning the tutorial, collecting available rewards, and using your existing equipment before deciding whether any optional purchase is useful.
Related Articles
guide
A Bizarre Run Battlegrounds: Beginner Combat Guide
Learn A Bizarre Run Battlegrounds basics, compare beginner Stands, check combat controls, and practice M1 combos with clear source-backed advice.
guide
A Bizarre Run Controls: Horse Keys, Boost and Hang
Learn A Bizarre Run controls for riding, items, and combat, resolve the F vs. Z boost conflict, and see what is confirmed about Hang.
guide
A Bizarre Run Falling Through the Map: Fix Status and Recovery
Check the reported Mr. President fix, understand under-map incidents, and learn what to do if a fall interrupts your A Bizarre Run race.
Was this helpful?
Thanks for the feedback!