
A Bizarre Run Stage 1: Route, Hazards and Racing Tips
Use this A Bizarre Run stage 1 guide for controls, stamina tips, slipstreams, hazards, and Gyro quest objectives.
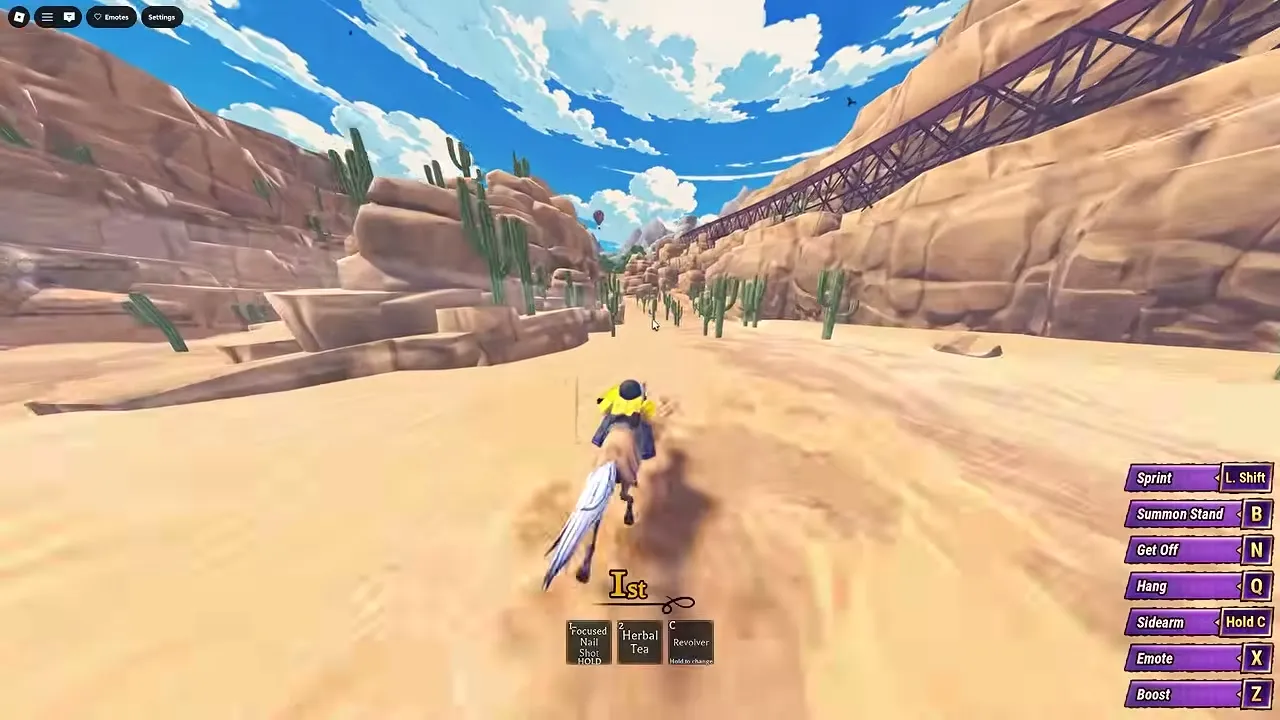
What should you focus on in Stage 1?
A strong Stage 1 finish starts with keeping momentum and avoiding mistakes that leave you behind. This A Bizarre Run stage 1 guide explains how stamina, slipstreams, environmental hazards, and boost timing affect your opening run. Use this A Bizarre Run stage 1 guide to prepare for the course, work toward relevant quests, and understand what finishing the first stage actually accomplishes.
General game reference: this recording provides context, not a dedicated demonstration or proof of every topic discussed here.

The "A BIZARRE RUN" Experience.. — Infu
View the source recording on YouTube.
This article covers the global Roblox public release, using the official A Bizarre Run listing information reviewed on November 9, 2026. The listing confirms a racing experience and a separate Battlegrounds mode. Route observations and quest details below come from community reports and player experience.
Community reports describe Stage 1 as the racing-focused opening section, with direct player combat disabled. Environmental interference still matters: racers can trigger traps along the course. Your immediate objective is to reach the goal with a strong placement while managing your movement.
Keep these outcomes separate:
- Finishing Stage 1 completes the opening section.
- Placing well in Stage 1 can affect stage rewards and satisfy a specific quest objective.
- Winning the full race requires more than reaching the first goal.
The reviewed sources do not establish a universal Stage 1 elimination cutoff. In particular, the top-10 requirement discussed below belongs to Gyro’s quest; it should not automatically be treated as the rule for advancing.
Prepare your mount and check the controls
Before entering the race, inspect your mount through the Customize menu. Community reports identify five relevant stats: Stamina, Acceleration, Handling, Top Speed, and Boost Length.
The linked beginner coverage describes stat changes as rerolls. That distinction matters when spending Cash: another roll changes the spread without guaranteeing that every attribute improves. No supplied evidence establishes a single best stat distribution for every Stage 1 run.
Learn how your current mount handles before repeatedly changing it. If you lose time by missing turns or exhausting stamina, identifying that problem gives you a clearer reason to adjust your setup.
Keyboard controls to know
The following inputs come from the official listing information supplied for this guide.
| Action | Officially listed input | Stage 1 use |
|---|---|---|
| Run on horseback | Shift | Sprint while monitoring stamina |
| Call your horse after falling | T | Recover access to your mount |
| One-time boost | F | Activate your limited boost |
| Pull out a secondary item | C | Access your equipped secondary |
| Choose a secondary item | Hold C | Select between available items |
| Jump | Space | Jump when the route calls for it |
The boost key has conflicting documentation. Community videos and the linked beginner article describe Z, while the official listing specifies F. This A Bizarre Run stage 1 guide prioritizes the official listing, but check the prompt displayed in your session before relying on either key. The reviewed sources do not explain the discrepancy.
These are keyboard inputs, not a verified controller or touchscreen layout. Use the controls shown by your game for another input method.
If you are still learning movement, complete the tutorial before judging your pace against other players. Player experience from the tutorial introduces sprinting behind another racer for a slipstream boost, making it useful preparation for the opening pack.
A Bizarre Run stage 1 guide: From registration to the goal
Use the release coverage as a broad route reference: registration and the start, canyon terrain, bridge and downhill sections, and the goal. The available material supports those landmarks, but it does not provide a reliable coordinate map for every shortcut.
For a first clear, learning how these sections connect is more useful than attempting an unfamiliar jump because another racer took it.
| Route section | Practical focus | Evidence limit |
|---|---|---|
| Registration and start | Get ready for the opening sprint and identify racers ahead | No exact registration interaction sequence is established here |
| Canyon | Follow the course and watch for environmental hazards | No complete trap-location map is supplied |
| Bridge sections | Keep your approach controlled and your route visible | No verified universal bypass is established |
| Downhill section | Watch stamina and prepare for the next movement | Player experience supports recovering stamina during this portion |
| Goal | Maintain your line through the finish | Stage placement does not establish a full-race win |
Manage stamina before it becomes a problem
Player experience in the Spin race video repeatedly emphasizes easing off when stamina runs low. The racer also uses a downhill stretch as an opportunity to recover.
Apply that observation by watching the meter throughout the course. If you have been sprinting continuously, look for a suitable section to recover before your next demanding stretch. Avoid building your entire finish around a stamina reserve you have already spent.
There is no supported fixed sprint-and-rest schedule in the reviewed sources. Your decisions should follow the meter and the terrain rather than an invented timing formula.
Learn shortcuts by their approach and exit
Community reports confirm that Stage 1 has shortcuts, and one recorded first-place run uses a boost while taking one. However, the transcript does not establish exact coordinates or a repeatable sequence of turns.
The route advice in this A Bizarre Run stage 1 guide therefore stays at the landmark level. On a learning run, identify where a shortcut begins and where it returns to the course. Attempt it when you understand both ends, especially if you are protecting a quest placement.
Use slipstreams, boosts, and hazards deliberately
The central racing advice in this A Bizarre Run stage 1 guide is to connect each speed advantage to a clear opportunity. Sprinting, drafting, and boosting all help, but they require attention to your position and the road ahead.
Follow another racer for a slipstream
Player experience from the tutorial describes gaining a slipstream boost while sprinting behind another competitor. That makes the racers ahead useful opportunities to gain speed.
Look for a racer whose path you can follow without losing sight of approaching hazards. Stay behind them while sprinting to trigger the mechanic, then choose an opening to move past.
You do not need to force yourself into exactly third place. Although community advice favors staying near the leaders, the reviewed sources do not establish one mandatory position or an exact drafting distance.
| Situation | Suggested response | Supporting observation |
|---|---|---|
| Another racer is directly ahead | Look for a slipstream while sprinting behind them | The tutorial explains this speed mechanic |
| Your stamina is running low | Ease off and monitor recovery | The recorded Spin run manages stamina this way |
| You recognize a shortcut | Consider whether it is worth using your boost there | A community first-place run uses this approach |
| Racers are passing environmental explosives | Watch for triggered hazards and protect your own path | Community coverage describes Stage 1 trap interference |
Give your boost a purpose
A known shortcut or a clear opportunity to gain ground provides a reason to spend the boost. Pressing it immediately without reading the course gives you less control over where that advantage helps.
The community Spin race and quest walkthrough includes a Stage 1 boost use and later shows the boost available again in Stage 2. That is player experience from the recorded run. It does not establish a freely repeatable cooldown or every condition governing replenishment.

WINNING WITH SPIN AND HOW TO GET & UPDATE ADDITIONS.. | A Bizarre Run — JustVision
Check your boost availability after the stage transition.
Treat environmental traps as an active threat
Community reports distinguish Stage 1’s disabled direct combat from its usable environmental traps. The Spin walkthrough specifically discusses triggering TNT with steel balls.
If you already have Spin, that offers another way to interact with hazards. It does not make Spin a prerequisite for completing the course.
Only spend attention on a trap when you can still follow the route safely. Player experience includes mishaps around explosives, so triggering something near your own path can undermine the time you hoped to gain.
Complete Stage 1 quest objectives and prepare to advance
For players pursuing Gyro’s Spin ability, Stage 1 also contains specific quest work. This A Bizarre Run stage 1 guide separates those objectives from general race completion because each asks you to do something different.
The reviewed community walkthroughs agree on the opening tasks:
| Gyro quest objective | Reported requirement | What to plan around |
|---|---|---|
| Slipstream | Accumulate 15 seconds | Use opportunities behind other racers |
| Stage 1 placement | Finish 10th or better | Protect your position through the goal |
| Find Gyro’s steel ball | Locate it during Stage 1 | Community reports describe a random spawn |
| Return the steel ball | Speak to Gyro afterward | Follow the quest’s return step |
The Spin walkthrough also reports a requirement of two wins for the quest line. The reviewed sources do not establish that first-place Stage 1 finishes satisfy that requirement. Check Gyro’s dialogue and your quest progress before treating an opening-stage victory as equivalent to a completed race win.
Choose between placement and searching
A random steel ball spawn prevents a dependable “go to this exact spot” instruction. No fixed spawn location, guaranteed appearance rate, or complete spawn list is supported here.
That creates a practical choice. If your active objective is finishing 10th or better, an extended search can cost the position you need. If you are specifically looking for the ball, recognize that searching may compete with your racing goal.
Check the current quest step before starting. This avoids spending a run pursuing an objective that is not yet relevant.
Use the train interval to prepare
Community reports describe a train waiting area after crossing a stage’s finish line. Players can purchase items there with in-game currency before continuing.
Stage 2 introduces direct combat, so the transition changes what you need to prepare for. Review your available equipment during the interval. A strong Stage 1 result helps your opening progress, but the later racing and fighting still remain.
Frequently asked questions
What is the simplest way to improve a Stage 1 finish?
Start with route familiarity, stamina management, and slipstream opportunities. The priority throughout this A Bizarre Run stage 1 guide is maintaining progress through the course. Add shortcuts and environmental interference once you can recognize their opportunities without losing your route.
Can other players attack you during Stage 1?
Community reports describe direct player combat as disabled during Stage 1. However, racers can trigger environmental traps, including explosives. Keep watching hazards even when ordinary attacks against other players are unavailable. Direct combat becomes part of the race in Stage 2.
Is the boost key F or Z?
The official listing specifies F for the one-time boost. Community footage and the beginner article specify Z. Use the official listing as the reference, then check the input displayed in your session. The reviewed sources do not resolve why those instructions differ.
Does finishing in the top 10 mean you won the race?
No. Finishing Stage 1 in 10th place or better is a reported Gyro quest objective. It is not evidence of a full-race victory, and the available material does not establish it as a universal advancement cutoff. Keep stage placement, quest progress, and the final race result separate.
Related Articles
racing
A Bizarre Run Horses: Stats, Rerolls and Riding Controls
Learn how A Bizarre Run horses work, which stats community guides report, where to customize mounts, and how to manage boosts and rerolls.
racing
A Bizarre Run Racing Tips: Slipstream, Stamina and Boost Timing
Use these A Bizarre Run racing tips to manage stamina, line up slipstreams, time horse boosts, and survive Stage 2 hazards.
racing
A Bizarre Run Saddles: Customize Menu and Confirmed Details
Find A Bizarre Run’s saddle options through Customize, with confirmed menu details and limits on prices, unlocks, and stat claims.
Was this helpful?
Thanks for the feedback!